We'll show you how to create and manage your Kubernetes Cluster through the Xelon HQ platform interface and command line interface called kubectl.
Create a Cluster
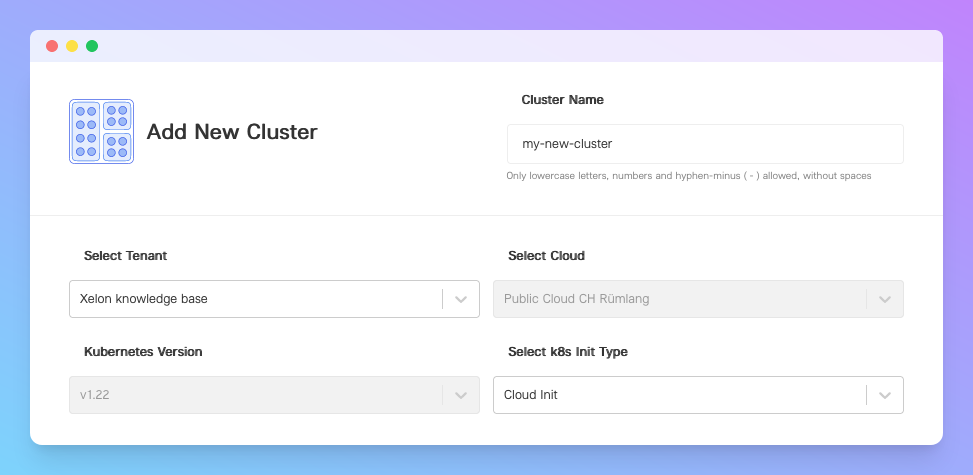
Within the platform right tab, go to Kubernetes > Create Kubernetes Cluster button. You'll see a Cluster creation wizard opened. You should define Cluster's display name and select the related organization (tenant).
For the 'k8s Init Type' field, we highly recommend selecting the 'Cloud Init' option only. Rancher-based Clusters won't be supported by our team in the near future.
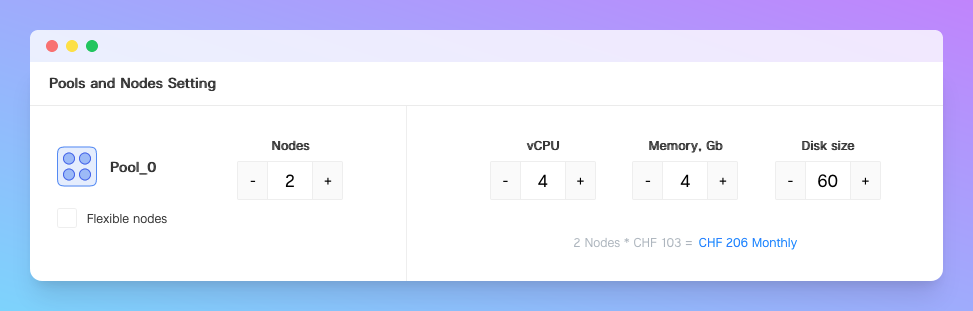
The next block allows you to configure Node Pools. Each pool represents a set of nodes that will run your workloads on. Feel free to adjust the size of each node depending on your needs, as node size can be changed any time.
Secure your app infrastructure with load balancing using the Flexible Nodes functionality.
When all set, click Deploy Cluster. Your Cluster will be up and running in up to 15 minutes.
![]()
Manage a Cluster
After your Cluster is provisioned, you can manage its settings, connect through kubectl, configure persistent storage, load balancers, and so on.
Cluster Info
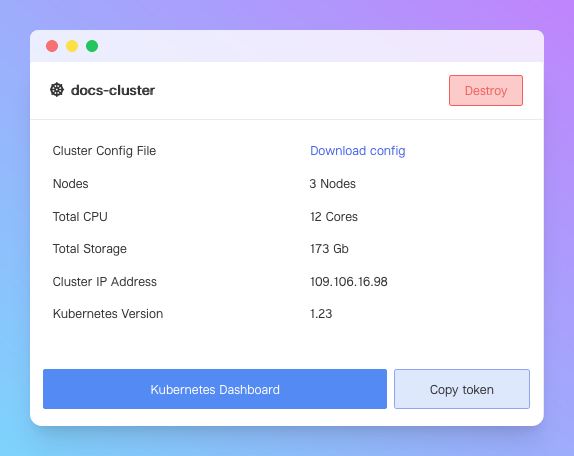
Here you can download the Cluster's config, see its basic configuration, and access the Kubernetes Dashboard using the copied token.
Service Accounts
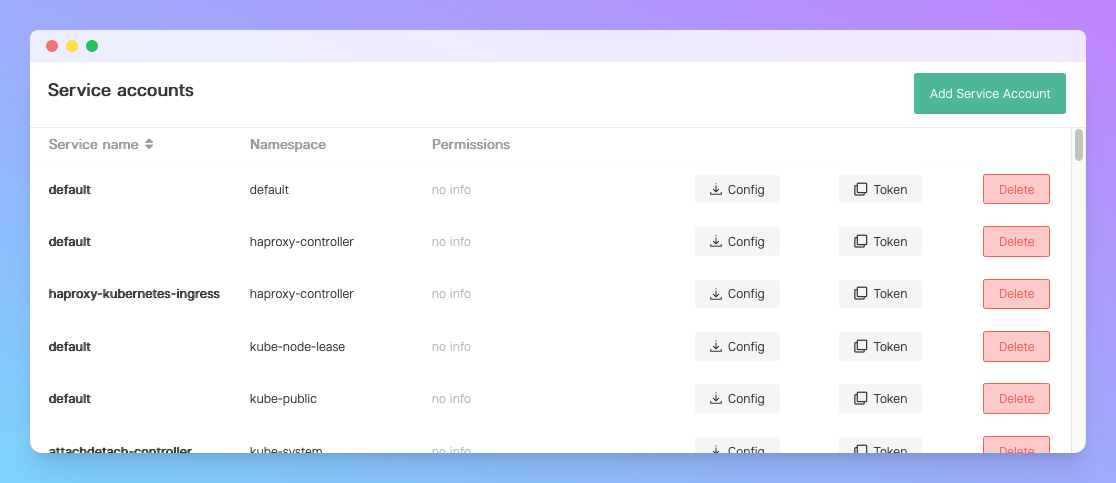
Service Accounts work the same way our Service Tokens do. After creating a Cluster, you have a root Service Account with a token that can be copied in a click of the Copy token button. Same goes for the list of Service Accounts within the Cluster dashboard: you can either create new one, copy a token for each of them, download their config, and delete.
Nodes
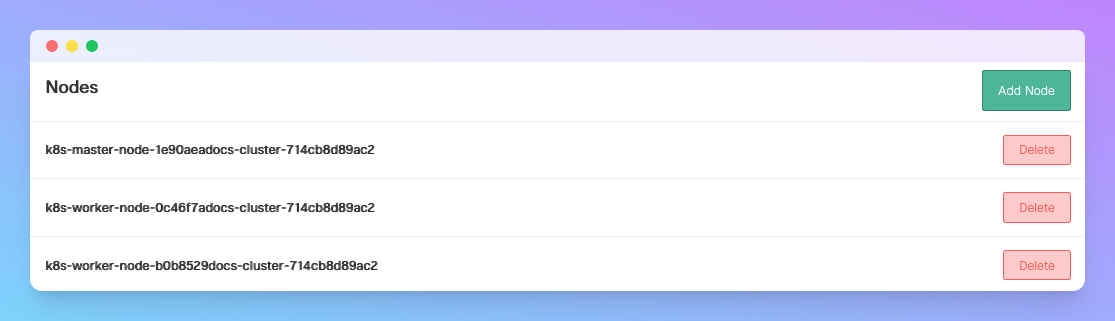
The Nodes block displays a list of all configured nodes within your Cluster. You can add a new node by clicking the green Add Node button. Nodes can be either Fixed or Flexible. If you have an unpredicted workload, we'd recommend to use Flexible nodes, otherwise feel free to go with Fixed ones.
Connect to Cluster through kubectl
You can manage your K8s cluster by connecting to it through kubectl – an official command line tool, which you can install on any platform.
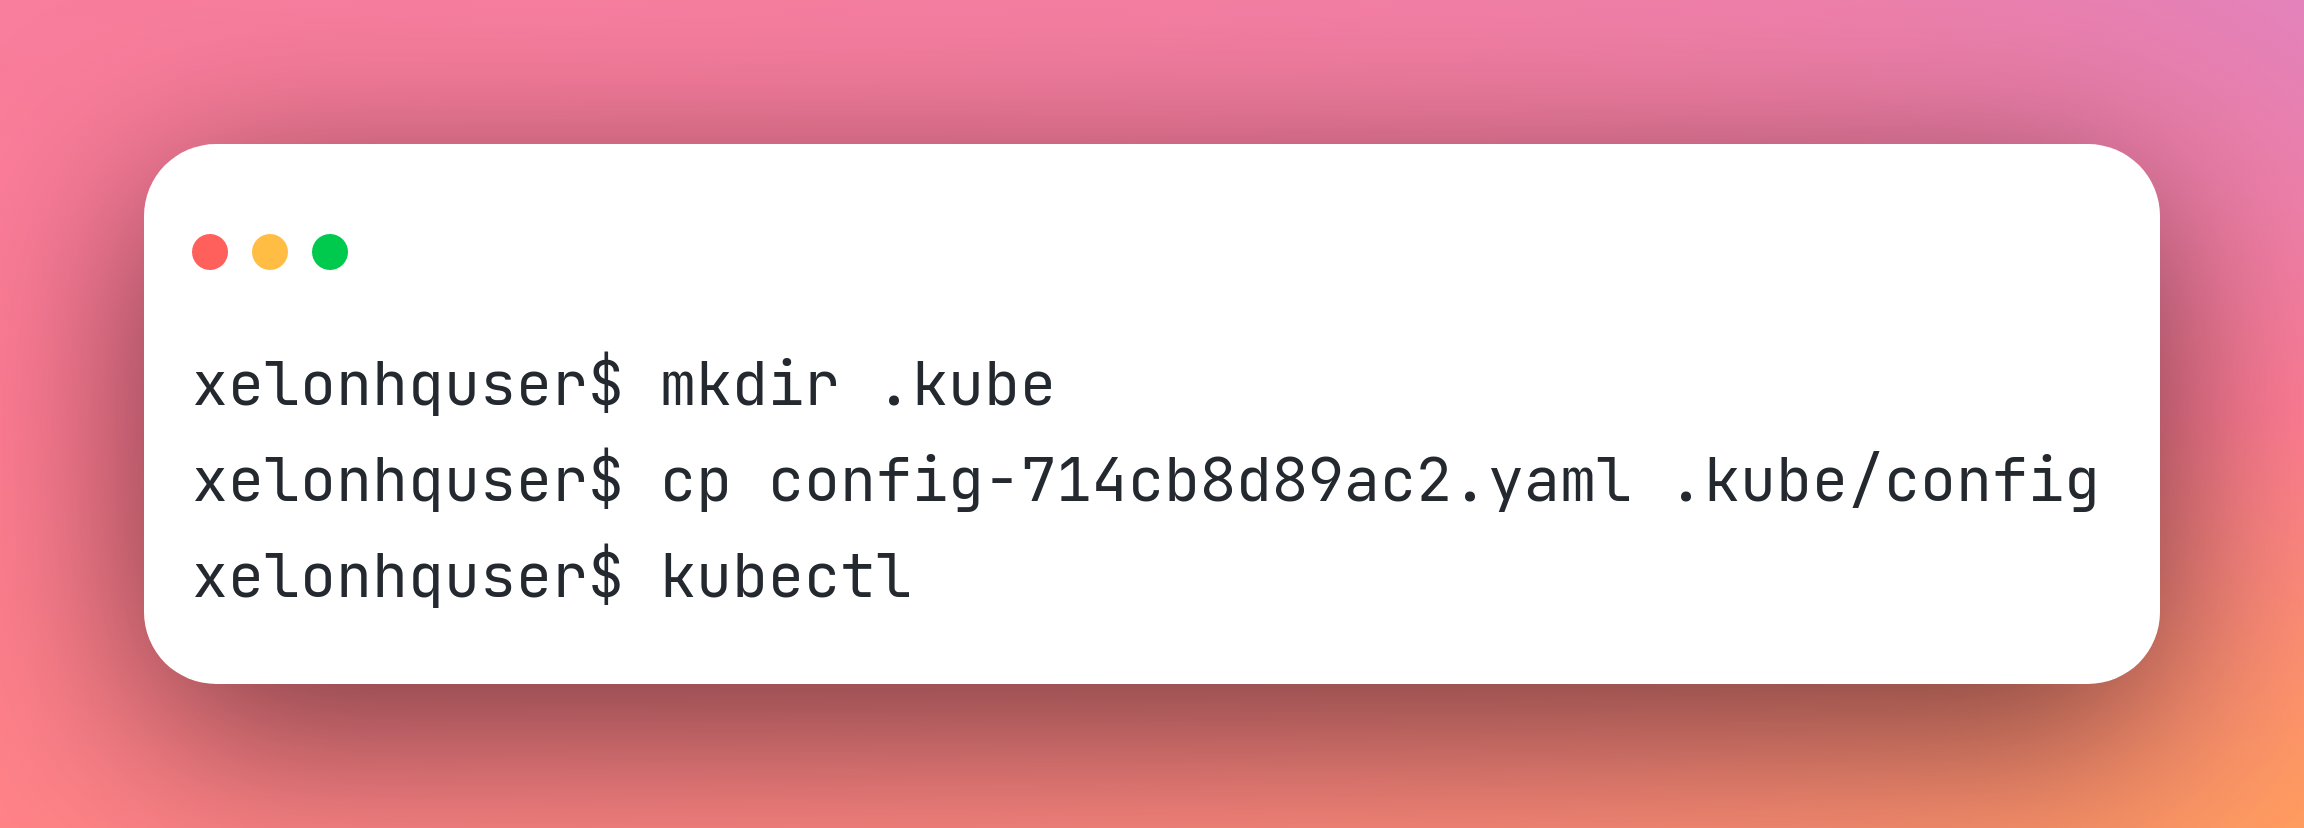
You'll need a Cluster config file to connect to your cluster through kubectl. Download the config from the Cluster's page, and make sure to keep it safe: you'll use it for the authorization later.
Use
$ mkdir .kubecommand to create a folder and copy your config file there through thecp your_config_file.yml .kube/configcommand.
Now, open your system's command line tool and type kubectl --help to learn about all related commands and flags. By the way, here's the list of commands we love and use most often:
kubectl apply -f path_to_yaml/file.yaml – This command creates or updates a specific resource: pod, deployment, config-map, secret, etc.
kubectl get resource-name – Displays the basic info about a specified cluster's resource of all types.
kubectl logs pod-name OR kubectl logs resource-type/resource-name – Displays resource logs (from the creation date to the current). Use a --follow flag to get new logs in real time.
kubectl get all -A – Will display all resources in all namespaces.